ELKINS : +1 (304) 637-2677
BUCKHANNON: +1 (304) 878-7570
M-F 10:am-5:00pm
ELKINS : +1 (304) 637-2677
BUCKHANNON: +1 (304) 878-7570
M-F 10:am-5:00pm

FREE 30 MILE DELIVERY!
.
FOLLOW US
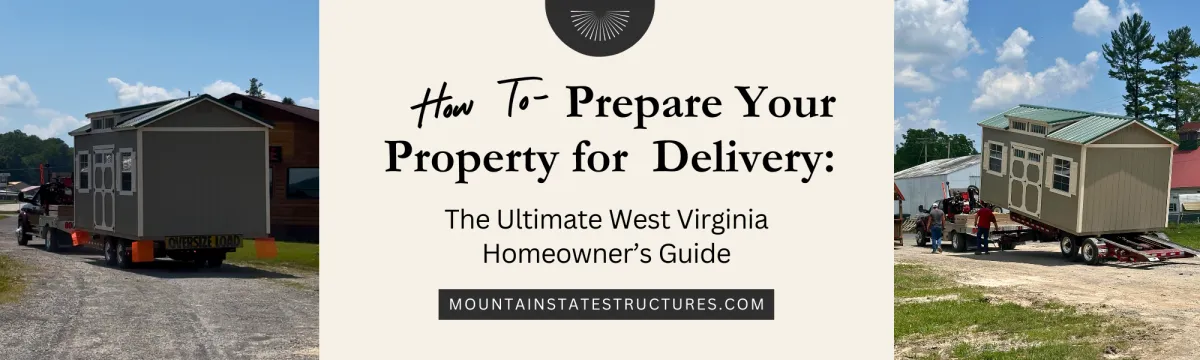
How to Prepare Your Property for Shed Delivery: The Ultimate West Virginia Homeowner’s Guide
If you’ve recently purchased or are considering investing in a premium portable building, shed, cabin, garage, or barn from Mountain State Structures, congratulations!
You're about to significantly upgrade your property’s value, functionality, and aesthetic appeal. However, proper preparation is crucial to ensure a seamless delivery and long-lasting structure. This comprehensive guide will walk you through everything you need to know to prepare your West Virginia property for shed delivery.
By: Hicksons Team
Step 1: Selecting the Ideal Location
Choosing the perfect site for your new portable building is foundational to fully enjoying its benefits and ensuring longevity and functionality. Carefully evaluating your site options will help avoid future issues and enhance overall satisfaction. Here’s a detailed guide to selecting the ideal location:
Accessibility
Accessibility is crucial for a smooth and safe delivery process. Assess your property to ensure the delivery vehicle—often a large flatbed truck or trailer—can reach your chosen site easily. Keep the following in mind:
Inspect and measure driveway widths and clearances, including overhead clearances, to accommodate delivery equipment.
Identify and plan around any obstacles such as fences, gates, trees, power lines, septic tanks, underground wells, gas lines, or other landscaping and structures.
Consider removing or temporarily adjusting any removable obstructions to facilitate safe delivery and placement.
Ground Condition
The stability and durability of your portable building significantly depend on the ground conditions at your chosen location. Ideal site conditions include:
Firm and stable ground to prevent shifting, settling, or structural damage.
Level terrain to maintain even weight distribution and prevent stress on the building’s structure.
Soil type considerations—firm soils like gravel or compacted clay are preferable, while sandy or overly soft soils might require additional stabilization measures.
Consider consulting a professional if the selected area requires substantial leveling, excavation, or stabilization.
Water Drainage
Proper water drainage is essential to protect your portable building from moisture-related problems such as mold, mildew, rot, and corrosion. Here’s how you can ensure effective drainage:
Avoid placing your shed in low-lying areas prone to pooling or flooding.
Choose a slightly elevated site or modify the landscape to create gentle slopes that direct water away from your shed.
Install additional drainage solutions like gravel beds, French drains, or other landscaping techniques if natural drainage is insufficient.
Sunlight and Shade
Evaluating sunlight exposure and shading on your chosen site is beneficial for comfort and maintenance:
Sites with sufficient sunlight exposure can help dry out moisture, reducing risks of mold and mildew.
Partially shaded locations might be preferable for buildings used as workshops, home offices, or recreational spaces, providing a comfortable interior environment.
Proximity and Convenience
Consider how you'll use your portable building when selecting its location:
For frequent daily access, a location close to your main residence is advisable.
For privacy or recreational purposes, you may prefer a more secluded or remote part of your property.
Local Building Codes and Regulations
Always consult your local city or county zoning office to ensure compliance with local regulations, including:
Required setbacks from property lines, roads, and other structures.
Building permits and associated documentation.
Restrictions or guidelines specific to portable structures in your West Virginia jurisdiction.
Obtaining and understanding these regulations in advance helps prevent future legal or compliance issues and ensures a smooth installation process.
Step 2: Site Preparation Essentials
Properly preparing your chosen site is vital to ensure your portable building remains stable, safe, and functional for many years. A carefully prepared location helps prevent structural issues, moisture problems, and unnecessary future maintenance. Follow these detailed steps to fully prepare your property before your portable shed or building is delivered:
Clearing the Area Thoroughly
Start by thoroughly clearing your selected site of any obstructions or debris that might interfere with your shed installation or future usability. The area should ideally be at least two feet larger than your shed’s dimensions on all sides. Here are specific actions to take:
Remove Vegetation: Cut down shrubs, bushes, tall grass, or any small trees. Roots from plants or trees can grow beneath foundations, causing shifting and damage over time.
Extract Tree Stumps and Roots: If tree stumps or large roots are present, these should be completely removed rather than simply cut down to ground level, as hidden roots can cause uneven settling later.
Remove Rocks and Debris: Clear away stones, rocks, sticks, and other debris. Even small debris can cause unevenness, affecting shed stability.
Relocate Utility Lines (if applicable): Ensure there are no underground utilities (gas, electrical, water lines) beneath your intended location. If unsure, contact local utility companies for site marking before excavation.
Leveling and Stabilizing the Ground
Once cleared, your selected site needs leveling to ensure optimal stability and prevent future structural complications:
Assess the Current Terrain: Determine whether the existing ground is naturally level or requires substantial adjustments. Use a long carpenter’s level or a laser leveling tool to check the slope and overall evenness.
Manual Leveling: For minor unevenness, use shovels, rakes, and tampers to smooth and flatten the surface. This approach can effectively address minor irregularities.
Professional Grading and Excavation: For significant slopes or uneven terrain, professional excavation or grading equipment may be necessary. Hiring a local contractor or landscaper ensures a thoroughly and accurately leveled site.
Soil Compaction: Ensure that soil is compacted adequately after leveling. Compacted soil provides a sturdy and secure foundation, significantly reducing the risk of future settling or shifting.
Ensuring Proper Water Drainage
Proper drainage is essential for the long-term stability and durability of your shed or portable structure. Poor drainage can lead to standing water, erosion, mold, mildew, and structural deterioration. Consider these strategies to ensure proper drainage at your chosen site:
Gentle Sloping: Create a subtle slope away from your shed foundation to encourage rainwater and snowmelt to flow away naturally. Generally, a slope of about 1/4 inch per foot is sufficient for effective drainage.
Drainage Solutions: For areas naturally prone to moisture retention or standing water, consider installing additional drainage systems:
French Drains: These buried gravel and pipe systems redirect excess water away from structures efficiently.
Gravel or Crushed Stone Beds: A 4-6 inch layer of gravel or crushed stone beneath your shed can significantly improve drainage and reduce moisture-related problems.
Elevate the Foundation: Slightly elevating the foundation (using blocks, piers, or gravel pads) is beneficial for improving drainage and protecting your shed’s base from ground moisture.
Final Checks Before Delivery
Perform a final, thorough inspection of your prepared site to ensure it's ready for shed placement:
Confirm the area is completely cleared, leveled, and appropriately compacted.
Double-check for adequate drainage, adjusting slopes or adding drainage solutions as needed.
Ensure all utilities and underground installations are marked and safely avoided.
Proper and thorough site preparation not only ensures the seamless delivery of your portable building but also guarantees its long-term structural integrity, enhancing your enjoyment and investment value.
Step 3: Choosing Your Shed Foundation
Selecting the right foundation is one of the most important decisions you'll make when preparing for your shed delivery. A properly constructed foundation not only supports your shed structurally but also significantly enhances its lifespan, stability, and overall performance. Below, we’ll explore several foundation options in detail, helping you determine the best choice for your specific needs and the terrain of your West Virginia property.
Gravel Foundation
A gravel foundation is among the most popular and practical choices for portable buildings due to its simplicity, affordability, and effectiveness in promoting excellent drainage. Here’s how to properly install a gravel foundation:
Site Preparation: Begin by outlining the exact dimensions of your shed plus an extra foot around all sides. Clear and level this area thoroughly.
Excavation: Dig approximately 4 to 6 inches deep, removing any remaining debris, vegetation, or roots.
Geotextile Fabric: For enhanced stability and weed control, lay down a permeable landscaping fabric before adding gravel. This prevents weeds from penetrating and gravel from mixing with the soil over time.
Gravel Layer: Fill the excavated area with a 4-6 inch layer of crushed stone or gravel (typically #57 or #411 crushed stone is recommended due to its superior compaction and drainage properties).
Leveling and Compaction: Thoroughly level and compact the gravel using a plate compactor or hand tamper, ensuring an even, solid surface that’s resistant to shifting and settling.
Gravel foundations are especially suitable for sheds used for storage, garden equipment, workshops, or lighter-duty recreational spaces.
Concrete Slab Foundation
Concrete slab foundations provide unmatched strength, durability, and stability. This type of foundation is particularly beneficial for larger or heavier structures such as garages, cabins, workshops, or buildings intended for heavy-duty storage. Follow these guidelines to create an effective concrete slab foundation:
Site Preparation: Clear and excavate the selected site down to stable, compacted soil, ensuring it's properly leveled and graded for drainage.
Creating Forms: Use wooden forms to outline your slab dimensions precisely. Typically, slab thickness ranges from 4 to 6 inches, depending on the building’s size and intended use.
Base Layer: Lay a layer of gravel or crushed stone (typically 4 inches deep) within the forms for improved drainage beneath the slab.
Vapor Barrier: For added moisture control, consider installing a polyethylene vapor barrier over the gravel before pouring concrete.
Reinforcement: To enhance strength, use rebar or wire mesh reinforcement within the concrete slab.
Pouring and Finishing Concrete: Pour concrete evenly, level thoroughly, and finish the surface smooth. Allow proper curing time (typically 5-7 days minimum) to ensure optimal strength before the shed is placed on the slab.
Concrete slab foundations provide a highly stable, low-maintenance, and permanent solution ideal for long-term use.
Concrete Blocks or Pier Foundations
Concrete blocks or pier foundations offer a flexible, adjustable, and budget-friendly foundation option, particularly suited to smaller sheds or portable structures. Here’s how to effectively set up a block or pier foundation:
Identify Block Placement: Determine placement points according to your shed’s size and structural support points. Blocks should be placed at corners and every 4-6 feet along walls for optimal support.
Level and Compact Ground: Ensure each block location is carefully leveled and compacted. Adding a small gravel pad beneath each block enhances drainage and stability.
Setting Blocks or Piers: Place concrete blocks or precast concrete piers at each marked support location, ensuring each is level with the others. Adjust heights as needed, often by using additional concrete block layers, shims, or leveling wedges.
Structural Integrity: Verify stability and proper alignment to evenly distribute your shed’s weight, preventing future sagging or uneven settling.
Concrete blocks or pier foundations offer excellent adaptability for uneven terrain and the flexibility to adjust your foundation if necessary.
Final Foundation Considerations
When deciding which foundation best fits your needs, consider these key factors:
Structure Size and Weight: Heavier and larger structures benefit most from a concrete slab, while smaller, lighter sheds can be suitably supported by gravel or blocks.
Terrain and Drainage: Gravel foundations offer the best natural drainage, ideal for moisture-prone areas, while concrete slabs provide unmatched stability on more stable terrain.
Budget and Longevity: Gravel and block foundations are budget-friendly, whereas concrete slabs offer higher durability and permanence at increased initial cost.
By thoughtfully selecting and meticulously constructing your foundation, you ensure the long-term integrity, usability, and enjoyment of your new Mountain State Structures portable building.
Step 4: Delivery Path and Access
Ensuring a clear and easily navigable delivery path is crucial to guarantee a smooth, safe, and stress-free delivery experience for your portable building. Delivery teams utilize large vehicles and specialized equipment to transport and position your structure, so careful preparation and planning of the access route is vital. Follow these comprehensive steps to properly prepare your property's delivery path:
Assessing Driveway and Entry Points
The driveway or primary entry point onto your property must comfortably accommodate delivery vehicles, which often include large flatbed trucks, trailers, or specialized shed-moving equipment. Here's what to evaluate carefully:
Measure Width and Clearance:
Carefully measure the width of your driveway or entrance path. It should be at least two feet wider than the delivery vehicle to safely accommodate it. Also, measure vertical clearance, considering branches, power lines, overhead structures, or awnings. Typically, delivery trucks require 13-15 feet of vertical clearance.
Surface Stability:
Inspect the driveway surface. It should be stable, compacted, and free of large potholes, uneven surfaces, or soft ground. Reinforce or repair weak areas beforehand to ensure the delivery vehicle's safe passage.
Clear Obstructions:
Temporarily remove or relocate obstacles such as gates, fence sections, vehicles, gardening equipment, and other movable items that could obstruct the delivery path.
Evaluating Turns, Corners, and Inclines
It's equally important to evaluate any tight turns, corners, or steep inclines along the delivery route. The dimensions and maneuverability of delivery equipment require sufficient room to navigate safely:
Tight Corners:
If sharp turns are present, measure carefully to ensure the delivery vehicle can navigate these corners safely. Delivery trucks often need extra maneuvering room for wider turns—clearing a broader area or temporarily removing obstacles at corners may be required.
Steep Inclines and Slopes:
Identify and evaluate any steep slopes, hills, or uneven terrain. Steep inclines can pose significant challenges and potential hazards for delivery vehicles, especially in wet or icy conditions. If steep terrain cannot be avoided, clearly communicate this to Mountain State Structures in advance to plan accordingly.
Bridges or Culverts:
If your driveway or property access includes bridges or culverts, carefully check their load-bearing capacity and dimensions to ensure they can safely accommodate the delivery vehicle and your shed’s weight. Reinforcements or alternative routes may need to be considered.
Alternative Routes and Secondary Access Points
Occasionally, your primary driveway or preferred access path may present significant limitations. In such cases, explore alternative or secondary access points:
Secondary Entry Points:
Identify alternate routes onto your property, such as back roads, side gates, or neighboring property access (with permission). This ensures you have backup options should unexpected access issues arise on delivery day.
Temporary Access Routes:
Consider creating a temporary access path across your lawn or field using plywood, gravel, or temporary ground mats to facilitate safe delivery vehicle transit without damaging your property.
Clear Communication with Mountain State Structures
Proactive communication with Mountain State Structures ensures delivery day success. Clearly convey any access concerns or special considerations well ahead of your scheduled delivery date:
Provide Photos and Videos:
Sharing detailed photos or videos of your driveway, entry points, and any challenging areas significantly helps the delivery team plan effectively.
Discuss Challenges Early:
If you anticipate issues with steep slopes, tight turns, low clearances, or any other obstacle, discuss them in detail with Mountain State Structures representatives. They can often advise on solutions or schedule specialized delivery equipment.
Confirm Vehicle Dimensions:
Verify the exact dimensions of delivery vehicles with the Mountain State Structures team to ensure adequate space planning on your property.
Final Delivery Path Inspection
Perform one final inspection of your planned delivery route just before delivery day:
Confirm that all obstructions have been cleared and any necessary adjustments or improvements have been made.
Ensure alternate routes are available and clearly marked if needed.
Communicate final confirmations with Mountain State Structures to avoid surprises on delivery day.
By thoroughly preparing your property’s access route, you'll significantly enhance the safety, efficiency, and overall success of your portable building delivery.
Step 5: Local Regulations and Permits
Understanding and complying with local regulations and permits is crucial when preparing your property for the delivery and installation of a portable structure. Regulations in West Virginia vary significantly depending on your location, city, county, and type of building. Being proactive ensures your shed or portable building installation complies fully with local laws, helping you avoid costly fines, legal disputes, or potential relocation of your structure. Below, we've detailed the essential aspects to consider:
Understanding Building Permits
Most cities and counties in West Virginia require homeowners to obtain building permits when installing portable structures, especially if these structures exceed certain size thresholds. Here’s how to navigate permit requirements:
Identify Your Local Permitting Authority:
Contact your city hall, county planning office, or building department to clarify your specific permit requirements. Permit procedures and requirements vary significantly by jurisdiction.
Document Submission:
Permit applications often require specific documentation, including:
Detailed property maps or site plans clearly marking the proposed shed location.
Shed dimensions, building materials, and design plans (which Mountain State Structures can readily provide).
Information regarding your proposed foundation type and method of anchoring.
Timeline and Approval Process:
Allow sufficient time for your permit to be reviewed and approved. Processing times can range from a few days to several weeks, depending on your local planning office.
Setback Rules and Property Lines
Setback rules define the minimum distance a portable building must be positioned from your property lines, roads, utility easements, septic systems, or other structures. These rules exist primarily to ensure safety, privacy, fire protection, and easy access to utilities. Here's what you need to consider:
Confirm Setback Distances:
Setback requirements can range from a few feet to several yards, depending on your jurisdiction and structure size. Common setback guidelines in West Virginia typically range between 5 to 20 feet from property lines.
Measure Accurately:
Clearly measure and mark setbacks before site preparation. Accurate measurements prevent future disputes with neighbors or local authorities.
Seek Variances if Needed:
If your desired location conflicts with local setback regulations, inquire about applying for a variance or exception. Variances typically require neighbor approval and may require additional review periods.
Zoning and Land-Use Requirements
Zoning regulations dictate how your property can be used and may directly impact your portable building installation. Zoning classifications can affect permissible building sizes, structures' heights, exterior aesthetics, and usage restrictions. Key considerations include:
Check Zoning Classification:
Confirm your property's zoning category (e.g., residential, agricultural, commercial) through your local zoning or planning department. Each classification has unique guidelines regarding acceptable building types and usage.
Residential Restrictions:
In residential zones, portable buildings are often subject to size, height, and aesthetic requirements. Confirming these rules in advance helps you select a compliant structure.
Historic or HOA-Managed Areas:
If your property falls within a historic district or homeowners association, additional guidelines, permissions, or aesthetic restrictions may apply. Always verify these regulations before purchasing or installing your shed.
Floodplain and Environmental Considerations
Depending on your property's location in West Virginia, environmental factors such as flood zones, wetlands, or other protected areas may impact your installation plans:
Floodplain Compliance:
If your property is in or near a designated floodplain, specific foundation and elevation requirements might apply. Your local planning office or FEMA flood maps can clarify these guidelines.
Environmental Protection Zones:
Areas near rivers, streams, lakes, or wetlands might have additional environmental protection rules. Obtain guidance from your local environmental department to ensure compliance and protect your property’s natural resources.
Working with Mountain State Structures
To simplify navigating local permits and regulations, Mountain State Structures offers valuable assistance:
Guidance and Documentation:
Our team can help provide necessary building plans, specifications, and documentation required for your permit applications.
Local Expertise:
As a local West Virginia company established in 2013, we understand regional regulations and can offer advice to help streamline the permit approval process.
Clear Communication:
Open and regular communication between you, Mountain State Structures, and your local authorities ensures a smooth, stress-free permitting and installation process.
Final Permit Checklist
Before delivery and installation, confirm the following:
Permit applications have been submitted, processed, and approved.
Setbacks are accurately measured and clearly marked on-site.
All zoning, environmental, and local HOA requirements have been met.
Any necessary variances or special permissions have been obtained.
Being thorough and proactive about local regulations not only ensures compliance but also significantly enhances the enjoyment and value of your portable building investment.
Step 6: Final Preparations and Scheduling
With most preparations behind you, the final phase before your shed arrives is critical to ensure a smooth, stress-free, and efficient delivery experience. Taking the time to verify each step carefully and coordinate closely with Mountain State Structures will set you up for success. Here’s a detailed breakdown of your final checklist and scheduling guidance:
Final Site Inspection Checklist
Before scheduling your delivery, perform a thorough, detailed inspection of your prepared site. Confirm the following items meticulously:
Site Clearance:
Walk through your shed placement area, confirming all obstacles—including rocks, stumps, roots, plants, and debris—are completely removed. Check for hidden obstructions or minor debris you may have missed previously.
Ground Leveling:
Use a carpenter’s level or laser level tool to confirm your site is evenly leveled. A consistently flat, stable surface is vital for ensuring your portable building’s long-term stability and structural integrity.
Water Drainage:
Carefully verify that proper drainage solutions have been installed or naturally exist. Ensure the site slopes gently away from the planned foundation area to prevent future water accumulation.
Confirming Foundation Stability and Integrity
Foundation Check:
Inspect your chosen foundation carefully—whether gravel, concrete slab, or pier blocks—to ensure it is solidly installed and stable. Confirm there is adequate compaction and even distribution of foundation materials.
Foundation Alignment:
Double-check foundation measurements and alignment with your building's exact dimensions. Make adjustments immediately if discrepancies are found.
Double-Checking Delivery Path and Accessibility
Final Path Inspection:
Walk through the entire delivery route from your driveway entrance to the shed location. Confirm clearances for width, height, turns, inclines, and surfaces. Ensure any temporary obstructions are scheduled for removal before delivery.
Emergency Access Adjustments:
If any last-minute adjustments or clearances are necessary, complete these well in advance to avoid delivery delays.
Verifying Permits and Local Regulations
Documentation Ready:
Ensure you have secured all required permits, variances, or approvals from local authorities. Keep copies of permits and approval documentation on hand during delivery to address any unexpected inquiries.
Setbacks Verified:
Confirm property lines and setback distances have been marked clearly on-site to guarantee compliance with local zoning regulations.
Coordinating with Mountain State Structures
Once all preparations have been thoroughly checked, you're ready to schedule your delivery with Mountain State Structures. Follow these guidelines for a smooth scheduling process:
Scheduling Your Delivery:
Reach out to Mountain State Structures to select and confirm a delivery date. To minimize disruption, choose a date when you or an authorized representative can be present throughout the delivery process.
Confirm Delivery Details:
Clarify all necessary details, including the approximate delivery time, expected duration of delivery, and any special equipment needed. Ask about what you should expect during the delivery process to avoid surprises.
Share Contact Information:
Exchange and verify phone numbers and contact details with the delivery team in advance, ensuring efficient communication on delivery day, particularly if unexpected circumstances arise (such as weather-related delays or route changes).
Preparing for Delivery Day
Availability:
Ensure you or a responsible representative will be present during delivery. Presence is essential for answering questions, confirming placement, and inspecting the structure upon arrival.
Clear Communication:
On delivery day, be prepared to clearly communicate your desired final placement and orientation of the shed to the delivery crew.
Prepare Documents:
Have your delivery order details, permit documentation, and site plans readily accessible for reference during delivery.
By meticulously following this detailed guide and closely coordinating your scheduling and preparations, you'll create a positive, streamlined experience from start to finish—allowing you to immediately enjoy your new portable building from Mountain State Structures.
Step 7: Delivery Day Checklist
Delivery day is an exciting milestone—your careful preparation will now pay off as your new portable building arrives at your West Virginia property. To ensure everything runs smoothly, it's essential to be organized and prepared for every step. This comprehensive checklist will help make delivery day as seamless, efficient, and stress-free as possible:
1. Presence and Authorized Representatives
Be Onsite:
Make arrangements to be personally available on delivery day. If you cannot attend, appoint a trusted and clearly briefed representative to oversee the delivery process.
Brief Your Representative:
If an authorized representative will be present, ensure they understand exactly where and how you want the structure placed, including orientation, setbacks, and special instructions.
2. Have Essential Documentation Ready
Prepare and keep handy the following documents and details:
Delivery and Purchase Documentation:
Include your order number, purchase details, and any communications exchanged with Mountain State Structures.
Permit and Approval Documents:
Keep copies of all required permits, zoning approvals, and variances in case any questions or issues arise during delivery.
Site Layout and Foundation Plan:
Have clear, accurate measurements and diagrams showing exact shed placement, property setbacks, and foundation dimensions ready for reference.
3. Verify Delivery Path is Clear and Accessible
Conduct a Final Walkthrough:
Before delivery vehicles arrive, walk the entire delivery path one last time, ensuring all obstructions—such as parked vehicles, yard equipment, furniture, or debris—are completely removed.
Ensure Safe Entry:
Open gates, fences, or other entry points wide enough to comfortably accommodate delivery equipment without delays.
4. Meet and Communicate Clearly with the Delivery Team
Establish Contact Upon Arrival:
Greet the delivery crew promptly upon arrival and clearly introduce yourself as the primary contact.
Clarify Expectations:
Provide explicit instructions regarding shed placement, orientation, door and window positioning, and any specific considerations important to your property or shed usage.
Discuss Special Conditions:
If there are special circumstances (such as delicate landscaping, septic areas, underground utilities, or specific access points), reiterate these clearly to avoid misunderstandings.
5. Monitor Delivery and Placement
Stay Accessible:
Remain available during the entire process. Occasionally, delivery crews may require immediate feedback or clarification about shed placement or adjustments.
Observe Carefully:
Watch the placement carefully from a safe distance to ensure the delivery is proceeding according to your wishes and planning.
6. Thorough Post-Placement Inspection
Once your shed is in place, conduct a thorough inspection to confirm complete satisfaction:
Structural Integrity:
Inspect walls, roof, windows, and doors for any signs of damage or issues resulting from transportation or placement.
Level and Stable Placement:
Confirm that the structure sits evenly and firmly on your foundation. Use a level to verify stability and correct alignment.
Functional Check:
Test doors, windows, locks, and other features to ensure proper operation. Confirm there are no gaps, sticking parts, or alignment issues.
Address Any Concerns Immediately:
If you identify any issues or questions during inspection, clearly communicate these to the delivery team immediately. Promptly addressing concerns ensures timely resolution and satisfaction.
7. Finalize and Confirm Completion
Sign-Off Documentation:
Once satisfied, confirm delivery completion by signing any required documentation. Keep copies for your records.
Take Photos:
Take photographs of the placed shed and its surroundings to document its delivered condition clearly and accurately.
Discuss Maintenance Recommendations:
Before the delivery team leaves, inquire about initial maintenance recommendations or follow-up questions, ensuring your new structure stays in excellent condition.
8. Post-Delivery Actions
Secure the Shed:
Ensure your shed is locked, and keys or combinations are secured before the delivery team departs.
Review Warranty and Support Information:
Review provided warranty details, maintenance tips, and Mountain State Structures’ contact information for future support needs or questions.
By carefully following this comprehensive delivery day checklist, you ensure a smooth, professional, and enjoyable experience, maximizing the benefits and longevity of your new portable building from Mountain State Structures.
Why Choose Mountain State Structures?
When investing in a portable building, choosing the right partner makes all the difference. Since 2013, Mountain State Structures has established itself as a trusted leader, providing West Virginia homeowners with premium portable buildings designed to enhance properties, lifestyles, and communities. Here’s why Mountain State Structures stands apart from the competition:
Exceptional Quality and Craftsmanship
We believe your portable building is more than just an extra storage space—it's a valuable extension of your home and lifestyle. That's why we use only the finest materials, state-of-the-art construction methods, and expert craftsmanship in every shed, garage, cabin, or barn we build. Our buildings aren’t just built to last; they're crafted to withstand West Virginia’s diverse climate, from harsh winters to humid summers.
Customizable Designs and 3D Building Options
At Mountain State Structures, we understand that every homeowner has unique needs. Our innovative and easy-to-use 3D building design tool allows you to customize every aspect of your portable building, from dimensions and layout to colors, siding, roofing materials, doors, windows, and interior features. Visualize your structure before it’s built, ensuring the finished product perfectly matches your vision.
Extensive Range of Portable Buildings
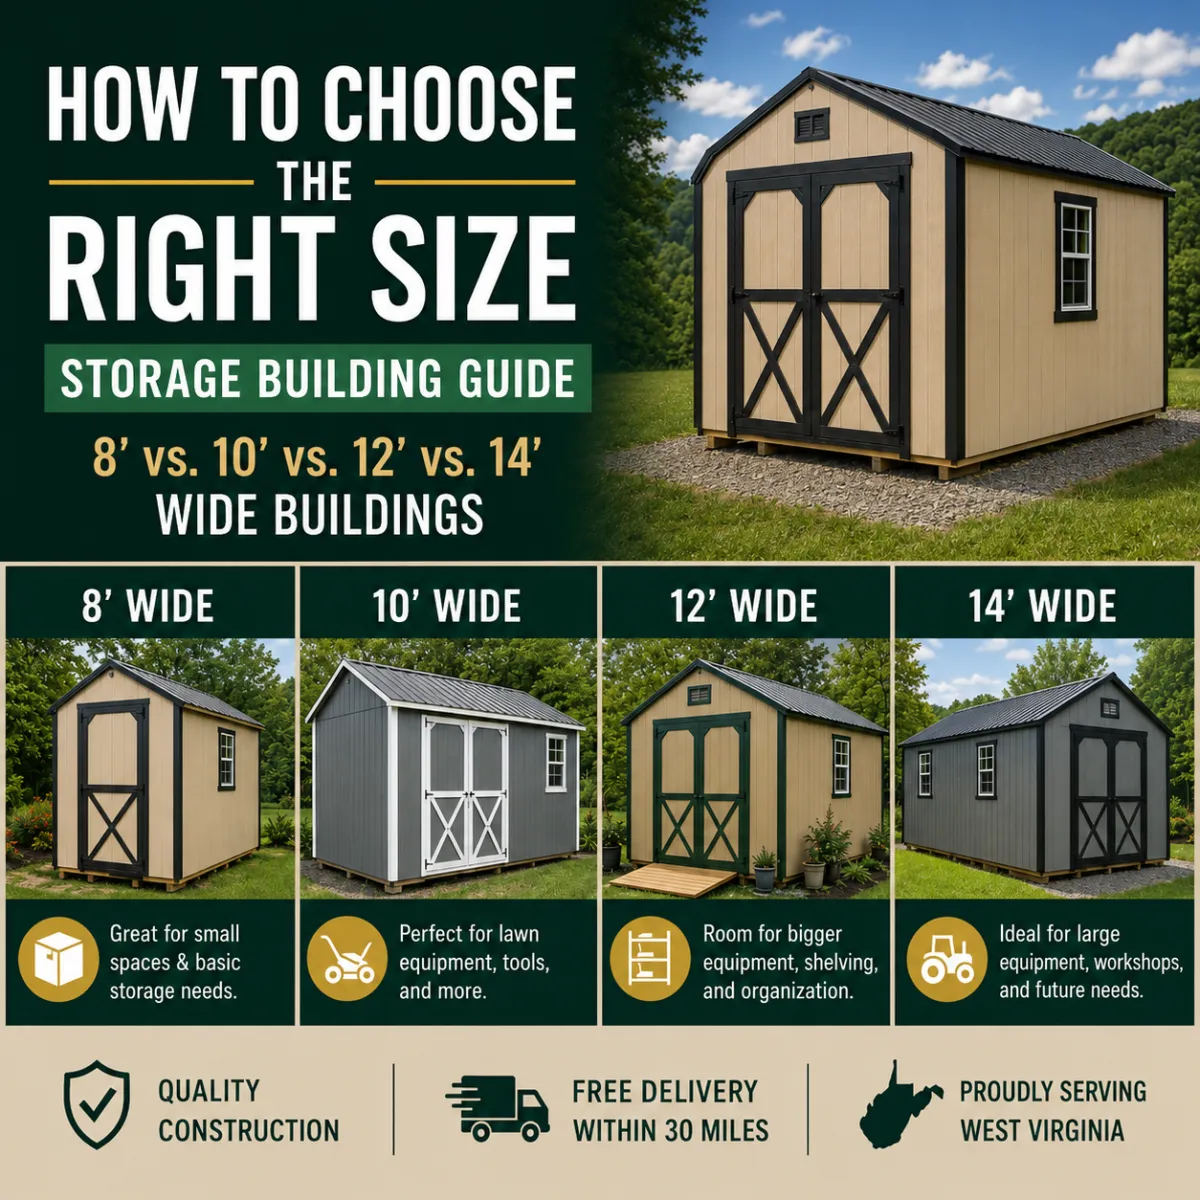
Our diverse selection of portable structures includes:
Portable Sheds: Perfect for garden storage, workshops, or hobby spaces.
Garages: Durable, spacious, and ideal for vehicles, equipment, or additional workspace.
Cabins: Comfortable, attractive spaces for retreats, guest accommodations, or vacation homes.
Barns: Versatile, sturdy, and built to meet agricultural, equestrian, or large-scale storage needs.
No matter your requirements, Mountain State Structures has a quality solution to meet your specific needs.
Unmatched Customer Support and Service
We pride ourselves on delivering outstanding customer experiences. From your first inquiry through installation and beyond, our dedicated team offers personalized guidance, prompt responses, and detailed assistance every step of the way. We're here not just to sell buildings, but to help West Virginia homeowners fully realize the potential of their property.
Locally Owned and Community Focused
As a locally owned and operated West Virginia business, Mountain State Structures is deeply invested in our communities. We understand local regulations, climate considerations, and homeowner needs. Our longstanding commitment to serving West Virginia ensures you receive relevant, reliable guidance backed by genuine local expertise.
Comprehensive Warranty and Peace of Mind
Your satisfaction and peace of mind are our top priorities. Every Mountain State Structures portable building is backed by a comprehensive warranty covering craftsmanship, materials, and structural integrity. Our warranty provides assurance that your investment is secure, and our ongoing support means you'll enjoy your portable building worry-free for decades.
Conclusion
Investing in a portable building from Mountain State Structures is a meaningful decision that enhances your property’s functionality, aesthetics, and value for many years to come. By thoroughly preparing your property and carefully following each step outlined in this guide, you set yourself up for an efficient delivery, seamless installation, and lasting satisfaction.
Mountain State Structures is dedicated to making your experience enjoyable from start to finish. Our proven record of excellence, customizable solutions, and unmatched customer care ensure you receive not only a quality building but also the confidence and support to make the most of your investment.
Are you ready to enhance your home with a premium portable building tailored to your unique needs? Contact Mountain State Structures today. Our friendly, knowledgeable team is eager to answer your questions, assist you with design options, schedule your delivery, and ensure your complete satisfaction.
At Mountain State Structures, we don’t just deliver buildings—we deliver peace of mind and lasting value to your West Virginia home.
Articles!


Innovation
Fresh, creative solutions.

Integrity
Honesty and transparency.

Excellence
Top-notch services.

COMPANY
CUSTOMER CARE
LEGAL
Copyright 2026. Mountain State Structures. All Rights Reserved.